Tuesday, November 25, 2008

Make your own Christmas decorations

I'm really into making my own Christmas decorations, always was and no doubt always will. This is probably because when I was growing up we used to make our own decorations every year. My grandfather would get us kids started and we'd have loads of fun. The decorations were always simple and made using basic materials such as coloured paper, ribbon, straw. It was the process I remember more than anything else. The relaxed happy atmosphere around the table with lots of paper mess on the floor and no one worrying about it. So every year (or near enough) I've been making something or other to decorate the tree. And since having had children the task is made even more meaningful and fun. I'd like it to become a tradition in our house.


This year I am making a few things all of which I will share here. I've made some VERY simple paper decorations using fancy scissors, glue, ribbon, single hole punch and paper shape punch. I love blue on a Christmas tree as I think the colour really stands out against the green and in particular this vivid blue. I also love it because the blue and red combinaiton is very common in Polish folk art. These decorations do not require step by step instructions, but I'll write a brief description for those who'd like it:


1. Using the scolloped edge scissors cut out the desired shape.

2. Using the single hole punch go around punching holes in any pattern you like and add a larger or different pattern using the shape punch (in this case the larger holes).

3. Take the ribbon and thread it through one of the holes making sure the decoration hangs neatly and symmetrically.

4. Once you're happy with it secure the ends of the ribbon using glue.

5. Additionally I glued the ribbon together at the hole where it's threaded for extra hold. I then added a small blue spot (out of the hole punch) just to finish it off.


The great thing about these decorations is that you can make them out of any paper and ribbon combination you like. you can cover your entire tree with one style. It's a cheap way of making a gorgeous tree and you can get together with other families and kids and decorate the tree in your own handmade gems.

I do occasionally make some fancier decorations if time permits. This year I made some handpainted goose eggs. These were originally intended for my tree only but I have had many enquiries about them and have made them available for sale through my website. The goose egg shells eggs came from www.angieseggs.com.au . A fantastic egg and everything to do with egg decorating supplier. Angie is very helpful and has outstanding customer service.


I painted these eggs using porcelain paints from Pebeo. The paints are great to use on an eggshell as they dont streak and give a fantastic even finish. I finished off each egg with two small wooden beads and satin ribbon. To make something extra special I finally painted this old urn that I've had for nearly ten years. I've been wating to paint it for a long time and at last I found a good reason to do it.
I collected some azalea branches from the garden and tied them together to make this twig like tree. I really like the result! If you'd like to purchase some of the hanging goose eggs, email me via my website for a special offer that runs out at the end of this month.


I hope you enjoy making your own decorations. I'd love to hear from anyone who makes their own and what they do.
NEXT WEEK MORE CHRISTMAS DECORATIONS AND AN ADVENT CALENDAR

Monday, November 24, 2008

Polish folk ritual for November

Christmas is just around the corner... well nearly, but before it comes I wanted to tell you about a wonderful Polish tradition that dates back to the 16th century in Poland and to the 12th century in central Europe. It is the popularly celebrated St Andrews festival on the 29th of November. The traditions followed on this day were focused mainly on young girls foretelling their future romantic prospects. I remember doing all these rituals when I was a young girl but I have no recolection of any particular future being revealed to me. The rituals are fun and make for a great get together. You don't have to be religious or believe in fortune tellers. St Andrews festival can be celebrated by anyone who wants to make a fun night of trying to see into the future. Here are some popular rituals to be done indoors or outdoors after sunset...


Pouring of wax...
You will need a bowl of cold water, a large old key and candles. Each person takes their turn to melt some wax (you might do this in a metal bowl to make it easier to pour the hot wax) and then pours it into the bowl of cold water through the hole of the key. The wax hardens in the water and forms a shape. The shape is taken out and held infront of candle light to reveal a shadow on the wall. The shape of the shadow is then interpreted to reveal what might happen in the near future for that person. For example a car shape implies travel, a flower a visit from a stranger, a coach foretells a wedding. The idea is to interpret these personally and intuitivelly.


Next in line...
In order to reveal who amongst all the ladies present (widows and divorcees included) will next get married each lady must remove one shoe. The first shoe is placed with its heel against a wall pointing in the direction of a door. Each subsequent shoe is then placed in front making sure the heel of the next shoe touches the toe of the last shoe. The shoes are thus lined up until one crosses the threshold. Whoever the shoe belongs to will be the next to get married. If there aren't enough shoes to make a line from the wall to the door, the first shoe may be taken from the back of the line and placed in front with all the other shoes following the same pattern until one reaches the door.


Whats in a name...
If you want a clue to the name of your beloved, whom you obviously are yet to meet, this ritual may reveal just that. Each person takes an apple and peels it carefully making sure the entire peel is in one piece. They then stand up and throw the peel behind them and turn to read what letter of the alphabet the peel has made. That letter is the first letter of their soul mates name.


These are just some of the many rituals that were practised for centuries. If you plan to make a night of it add to the tmosphere by dimming the lights or doing it outside by a fire. Most of all have fun and have a laugh and who knows what fortunes foretold may come true. If you know of any more rituals or have memories of practising these I'd love to hear from you :)
TOMORROW...CHRISTMAS DECORATIONS


Saturday, November 8, 2008

Wrapping presents

I love wrapping presents. Each Christmas one of the things I look forward to the most is the pleasure of wrapping presents. It's something I start thinking about even before I start thinking what I'm going to buy for whom! This year I've decided to use the simple and old favourite brown kraft wrapping paper and decorate it with cut out shapes from my screen printed paper (see "wrapped with love" post)

You can have a lot of fun with the patterns on this paper or any other patterned paper. Remember the pattern should be large enough for you to be able to cut it out without too much fuss.


I'm starting with the basic plain brown paper, scissors, sticky tape,
glue (you can use regular stick glue), twine and Laikonik wrapping paper.


Start by wrapping all the presents in the plain brown kraft paper.


Cut out the desired patterns, shapes or images that you'd like to use.


Arrange all your pieces so you can clearly see what you've got to work with.


Glue the back of each piece and stick it onto the wrapped gift in a pattern of your choice. It's a good idea to lay out even a bit of the pattern before you glue it on so you can see what's going to fit and what won't.


Wrap string around each present or ribbon if you prefer.


For something different write on the side of the gift instead of using a seperat gift tag. You'll be able to write a longer greeting and won't have to fuss about with a tag! And there you have it, a gorgeous stack of pressies ready to go under the tree!


image source: Real Living magazine, November 2008, (p 59.)

Also have a look at this amazing paper. It's called Juliette Paper in Blue and it's from Pepe's Paperie.

HAVE FUN!

Monday, November 3, 2008

Chatter Books

I love hearing my children talk. I admit sometimes I need a break from the constant chatter that comes from my three and four year old but for the most part I am fascinated by how they express themselves. In particular how they get around explaining things they don't yet know much about or don't fully understand. The funniest ones I find are the twisted words or names of things which they can't quite remember but they know what it is so they call it something else. For example, with great seriousness our son referred to the film "101 Dalmations" as "ten thousand dogs". It's things like that that make me dive for the wooden draw where I keep their little Chatter Books.


I keep two little books one for each of my children purely to record the wonderful things they say and how they express themselves. The books are nothing fancy, just some paper with a design on the front which has all been handstitched together. They are as small as a regular notebook and I always keep a pen handy. I would encourage ANYONE with kids to keep one. I only ever record one sentence at a time. Sometimes I write nothing in it for a few weeks and sometimes I'll write in it everyday for a week.

When they were learning to talk I recorded what words they knew at what age. Then came the expressions and now the really funny, interesting and profound stuff. I will continue this for as long as I can. You'll be suprised how quickly and easily you end up with a wonderful record of what's been going on in their heads. In the same way as the records I keep for each of them in the Once-A-Year books, the Chatter Books will give them a wonderful insight one day into how they developed their thinking and expression. Perhaps it may help them to know themselves better when they are adults. Isn't that what we're all after? To know ourselves deeply and honestly. Now some may think that the things kids say are mostly trivial or just cute. But I would argue that children can give us an insight into ourselves and can help us see simplicity and truth if we just listen. So I'd like to share with everyone this idea of the little Chatter Books. I've scanned in my two and as you can see they look pretty worn, but it's the content that makes them beautiful. Below are a few of my favourite entries...


"Mummy I was so upset that I lost my memory, and it fell out of my head and into my tummy!" 5 minutes later: "I got my memory back again! I just squeezed my tummy and squeezed it back into my head!".


"I have an eyebrow ache from all that blinking".


"When you're out of breath you should wait for a windy day and open your mouth so that the air goes into your lungs".


"Mummy come and watch me do a poo, in the end it's going to be amazing!".


Stanley insulting his sister:"You compost fairy!!"


"When you die you turn invisible. That's what happens".


Wednesday, October 29, 2008

Wall hangings

Well I've got the bug. Recently I have been hyperactive with desire to decorate everything around my home. I have to hold myself back as we are living in a rented property and of course I can't just go and paint a huge mural on the outside wall. God knows I'd love to do it. For now I have to satisfy myself with other decorative items and some new products. I've just done this wall hanging for our bedroom. Wall hangings are a big thing in Polish folk culture with many traditional interiors having little blank wallspace left due to all the decorations.


Traditional Polish village home in Zalipie, Poland
image: "Polska Sztuka Ludowa", Aleksander Jackowski


Having recently done some new wrapping paper I loved the design of it so much that I decided to use it to make a wallhanging. I'm reluctant to overuse the same pattern on too mnay things but I couldn't resist this wall hanging. I used 100% raw silk and screenprinted directly onto a large piece. The edges are stitched to give it a neat finish and the bottom is freyed to keep in style with many other traditional wall hangings. A simple stick from my garden through the top and some twine to hang it. I'm pleased with the result and will do some in other colours too. I must say a huge thank you to my friend Lisa from http://www.theredthread.com.au/ and check out her fabulous blog too http://www.theredthreadblog.blogspot.com/ for allowing me to use her home and her sensational camera to photograph this wall hanging recently as well as all my other products. Thank you Lisa!


Old Polish Folk-Art

I'm feeling very excited right now. You know the kind of excitement you get when you can barely stay still inside your own skin? That's me right now. I have just come from the decor8 blog and read Hollys post www.decor8blog.com/2008/10/29/turkish-delights-ideas-for-new-motifs . I was thrilled to read about her own love of traditional craft from different cultures and how much she valued work that had deeper meaning that just wanting to be "in" with the latest trends.

All my work at Laikonik has been about connecting me back to my own Polish culture. I have spent a lot of time recently reading about the cultural habits of the Poles as well as the creative aspect of their daily lives. One thing that came up again and again in the books I'm reading is the idea that the folk art was created out of a sense of tradition and belonging to a culture and a group. There was no personal authorship and no one person strived to stand out for the sake of fame or money. People created their art and craft out of a basic need and desire for an aesthetic environment coupled with cultural meaning behind patterns, colours and shapes. This is what I believe gives the work such purity and innocence. If you have a look at most of it there is no attachment to precision or perfection of line or shape. Have a look at the dowry chests. They have a beauty in their imperfection.

The basic need for aesthetic is, I believe, something that we all share. We all surround ourselves with beautiful things. We decorate our homes and our bodies. We like to see beauty, it is part of being human. It's precisely this kind of philosophy and approach to creativity that drives me. I can not stand anything that is created because it will sell or because it follows current trends. I will be posting some more examples of work from these wonderful books in days to come. For now I hope you enjoy some of these images.


Dowry chest
image: "Folklor", Bosz/Art


Dowry chest
image: "Folklor", Bosz/Art


Traditional village homes decorated with floral motifs

image: "Polska Sztuka Ludowa", Aleksander Jackowski


image: "Polska Sztuka Ludowa", Aleksander Jackowski


pouring of sand outside the home during a religious holiday
image: "Polska Sztuka Ludowa", Aleksander Jackowski


Traditional interior
image: "Polska Sztuka Ludowa", Aleksander Jackowski

Wednesday, August 27, 2008

Wrapped with love

I'm delighted at my latest development with my new wrapping paper. I've been working on this for a few months on and off and finally I'm happy with the design and outcome. The wrapping paper will be available for sale through various retailers from around mid september. Check the Laikonik website for stockists, www.laikonik.com.au


This project has been a labour of utter love for me. All my products are made with love but this one was special. Firstly I saw the wrapping paper sheet as a canvass for a big folk art design. Secondly I've always been inspired by the embroidery on a collar of a particular mens coat. It's a traditional Polish coat and the embroidery has never ceased to draw my attention and amaze me. I've always wanted to do something with it.


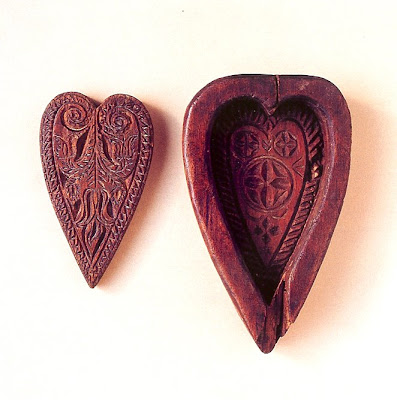
The wrapping paper design features elements of it as well as a fragment of a decorative butter mould. It's incredible how things used to be treasured in those days. That someone would go to the trouble of decorating and carving a wooden butter mould and then pouring the butter in, letting it set and serving it on some special occasion. Just imagine how much care would have gone into all the food being served and the table cloths ironed and the cutlery polished if just the butter was so beautifully decorated.


I will be using the design for the wrapping paper on other products amongst other things I'll be making small notebooks and propably other bits and pieces just because I won't be able to help myself. I'll add them to the blog as soon as they're done.

Keep visiting!