
Saturday, July 18, 2009
That dreaded flu
Just a quick hello today to all my wonderful visitors. I don't know anyone in Sydney who isn't sick with some type of cold or flu. My children, partner and I are all sick and we are taking it easy until we recover. I have not seen a flu epidemic like this before. I hope where ever you are the nasty flu virus won't get you and if it has I hope you get well soon. I will blog hopefully in the next few days. Take care and stay warm if you're in the winter season!

Sunday, July 12, 2009
Changing styles and colours
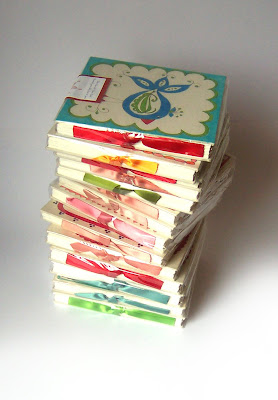
When I started Laikonik 3 years ago I had no idea of what exactly it was that I was going to be selling or making, who I would sell it to or where I would sell it. The very first things I made and sold were these small hand made photo albums which were covered in hand painted cotton. I fell in love with the process of painting on fabric and have never really deviated from that too much.
My very first stall was at the St Ives Heritage Craft Fair market in Sydney. Only my friends who came to the market to share my excitement bought from me. No one else did. But that wouldn't stop me. i loved making and decorating things. Anything really but the whole thing about paper and fabric and painting and gluing and creating something useful made me feel great inside. So below are images of the very first albums and notebooks that I ever made.
I haven't looked at them for a long time and when I dug out these images today I realised just how much I adored seeing them all together on my little market stall each month. I also just realised that colour is what I love most about my designs.

These were A4 dry mount photo albums. I made the pages in different colours to make them different from the standard black.

Smaller photo albums. Also dry mount but A5 in size.

Notebooks covered in hand painted cotton which was always fun to paint. These notebooks were stitched by hand and included a button for winding the cotton around and "closing" the book.

These were great and always sold very well. Tiny little pocket books about A6 in size with multi coloured paper inside.

Mixed collection of all the photo albums and notebooks.
Later on when I started making the Once-A-Year books (for chronicling the first 18 years of a child's life) I would hand paint the covers. Since I was only selling about 5-10 books a month I could get away with that and the covers were always different. Below are some of the designs I used to sell. Now I have the designs screen printed onto the fabric in various different designs and colours. The books now sell all over Australia and in Belgium and have been featured in several popular printed publications as well as on other blogs.

The very first Once-A-Year book designs.
 Later I made the designs more elaborate as I started having fun with fabric paints and fabric paint pens.

These designs were a short fad, although I always loved them they were too labour intensive to keep up on a regular basis. By this stage I started thinking of screen printing. A few more of the early hand painted range.
What I realised having looked at all these designs from the past is that I truly love colour. And so I have decided to start injecting more of it back into all my new designs which I am working on at the moment. Will keep posted about this...
If you would like to see the current design range of the Once-A-Year books please visit my website http://www.laikonik.com.au/
I am also planning on bringing back notebooks and pocket books for possibly this Christmas. If you'd like to be notified of all my new products and special offers please go to the website's contact page and email me to join the mailing list.
Sunday, July 5, 2009
DIY flower crown
Quite some time ago I made this flower crown as a gift for my daughters friends 5Th birthday. The crown was modelled on a traditional headpiece worn by traditional brides from the Lowicki region in Poland. (see image below).

My crown was nowhere near as decorative or beautiful as the real thing but I figured it would be something a little 5 year old girl would love. It was made more special because my daughter and I made it together.

The crown is made entirely from felt. The flowers, hearts and felt ribbons at the back are just cut by hand with no particular stencil or pattern. The actual crown piece (in orange) is cut from a heavy weight felt that I don't know the name of. I bought it in Spotlight (a large fabric store in Australia) and they didn't know what it was called either. If anyone knows could you leave a comment? It kind of feels almost like a felty carpet. All the decorations are just stitched on.

We cut the flowers out first and then matched up the colours and decided where they would go by placing them onto the crown piece while it was laid out flat. We glued the flowers on lightly with little dabs of glue just to position them into place and then I stitched each flower on. From the inside you can see that I covered up the stitches of each flower by gluing a felt spot onto each cross stitch. This is not a difficult project but it's time consuming. Set aside an afternoon especially if you're doing it with your child :)

Most importantly the birthday girl loved it!
Monday, June 29, 2009
DIY wallhangings
Some time ago I did a post about my new wall hangings that I now sell through various Australian retailers. I love wall hangings and always have. And I think they are very easy to make and hang in your own home. All you need is some fabric, some fabric paints and a sewing machine. I used calico for all these. The ones pictured below are some of the many I have made in the past.
The Elephant. I made this one by first drawing the design onto the fabric with a pencil and then redrawing the lines with a permanent marker. Every time I paint directly onto the fabric I always water down my paints instead of using them straight out of the tub as they are. The thicker the paint is the slower it will go onto the fabric and you'll find yourself painting using tiny strokes and constantly re dipping your brush. The watering down allows the paint to flow better along the fabric. The back of this wall hanging is left plain and the whole thing is sewn like a big pillowcase. As you can see I added felt tabs at the top just to make it a bit more interesting. Put a stick through the top and you're done! This one was for my sons room but he didn't like it so it now hangs in the entrance way.

These next three I made for my daughters room and she actually liked them! I made all three like patchwork quilts out of old bits and pieces of fabric that I hand painted a long time ago. I had a lot to chose from so I decided to do one in all pinks one in all blues and one multi-coloured. For the centre panel on each one I used a piece of her old clothing that she no longer fit into. Like the front of an old top or a summer skirt. In fact when I finished these I thought it would be great to make one huge wall hanging completely out of her old clothes. I may still get around to it. She has many years left of growing out of clothes. I also liked this idea as it made these wall hangings special and personal. And the sentimental me imagined that she may one day like to hang them in her own daughters room. Or better still add another few panels from her daughters old clothes or her own hand painted bits of fabric. Oh the possibilities of heir looming are endless!!


 This blue one was put away as my daughter did't think it suited her room anymore. Please forgive the wrinkled state of it in this photo!
Over the next couple of weeks I will be making another wall hanging, again out of some left over pieces of hand painted fabric. I will post next week about the bits and pieces. For some time now I have been painting on and off and experimenting with different styles and techniques. So now I've ended up with a bag of squares and rectangles and as I like to say: "when in doubt make a wall hanging."
Till next week!
Sunday, June 28, 2009
The winners!
Hello everyone. It's moday morning and as promised here are the winners of the give away. I put everyones names into a box and asked my children to fish them out! Please email me your postal addresses laikonik@optusnet.com.au
Thank you for visiting and commenting! I hope you like the papers :)
veri maz
Sarah
Freckles
Barb Fisher
sneakycrafty
Thank you for visiting and commenting! I hope you like the papers :)
veri maz
Sarah
Freckles
Barb Fisher
sneakycrafty
Sunday, June 21, 2009
First ever give away!
Hello everyone. I am loving these new wrapping paper colours so much that I have decided to do my first ever give away and share them with some of you :)
It will be my way of saying thank you for visiting and reading my blog.
I have five packs of four colours to give away, see the picture below. Each sheet measures 760mm x 570mm and is a good quality 80gsm brown kraft which has been hand screenprinted. If you like the idea of wrapping up a present for a loved one in one of these just leave a comment here and next monday, 29th June I will announce the five winners. I am happy to post anywhere in the world :)
Cheerio!

It will be my way of saying thank you for visiting and reading my blog.
I have five packs of four colours to give away, see the picture below. Each sheet measures 760mm x 570mm and is a good quality 80gsm brown kraft which has been hand screenprinted. If you like the idea of wrapping up a present for a loved one in one of these just leave a comment here and next monday, 29th June I will announce the five winners. I am happy to post anywhere in the world :)
Cheerio!
Monday, June 15, 2009
New wrapping paper colours...
Is it June already!? I am embarrased that so much time has passed and I have not blogged. I hope you all haven't abandoned me out of boredom and lack of interesting reading material. I have a few new things up my sleeve and also over the next few weeks I will be sharing some of the things I have been dabbling in.
For now here is a sneak peak at the new colours of my wrapping paper. I am delighted with how they came out. The red and the white are the same and I now have a gorgeous light aqua blue and a mustard available.
This friday I will be emailing out a special offer for everyone on my mailing list. If you're not yet part of it please email me laikonik@optusnet.com.au to take advantage.

For now here is a sneak peak at the new colours of my wrapping paper. I am delighted with how they came out. The red and the white are the same and I now have a gorgeous light aqua blue and a mustard available.
This friday I will be emailing out a special offer for everyone on my mailing list. If you're not yet part of it please email me laikonik@optusnet.com.au to take advantage.
Subscribe to:
Posts (Atom)


 Posts
Posts


